One of the most critical aspects of API development is providing comprehensive and accurate documentation. Whether it is just (future) you or your team members, having some good documentation ensures that developers understand how to use your APIs effectively, improving the overall developer experience. But up-keeping this documentation as your API evolves can be a chore and often fall by the wayside. In this blog post, we will discuss how to document your ASP.NET Core APIs using OpenAPI, a widely-adopted industry standard for describing RESTful APIs. OpenAPI, previously known as Swagger, provides a standardized format for API documentation, making it easier for developers to understand and consume APIs.
What is OpenAPI?
OpenAPI is a specification that defines a standard, language-agnostic interface for RESTful APIs. It allows both humans and systems to discover the features of an API without having to study the source code or pour through documentation. By using OpenAPI, you can generate interactive API documentation, client SDKs, server stubs, and even perform automated testing.
Setting up OpenAPI in an ASP.NET Core Project
Two of the more common implementations of OpenAPI in .NET are the NSwag and Swashbuckle projects. Today, we’ll look at the Swashbuckle library for generating an interactive client that we can use to document and exercise our ASP.NET API. You can add Swashbuckle to your project by adding this NuGet package:
dotnet add package Swashbuckle.AspNetCoreNext, configure the middleware by adding the following in your Program.cs(or Startup.cs):
builder.Services.AddSwaggerGen();Next, add these lines to have the middleware serve up the generated JSON document and API explorer UI within your application. Depending on the API you are building, you may not want these developer-centric tools to be exposed to external users. If that’s the case, you can selectively enable these by wrapping them in an environment check, like I have done below.
if (app.Environment.IsDevelopment())
{
    app.UseSwagger();
    app.UseSwaggerUI();
}
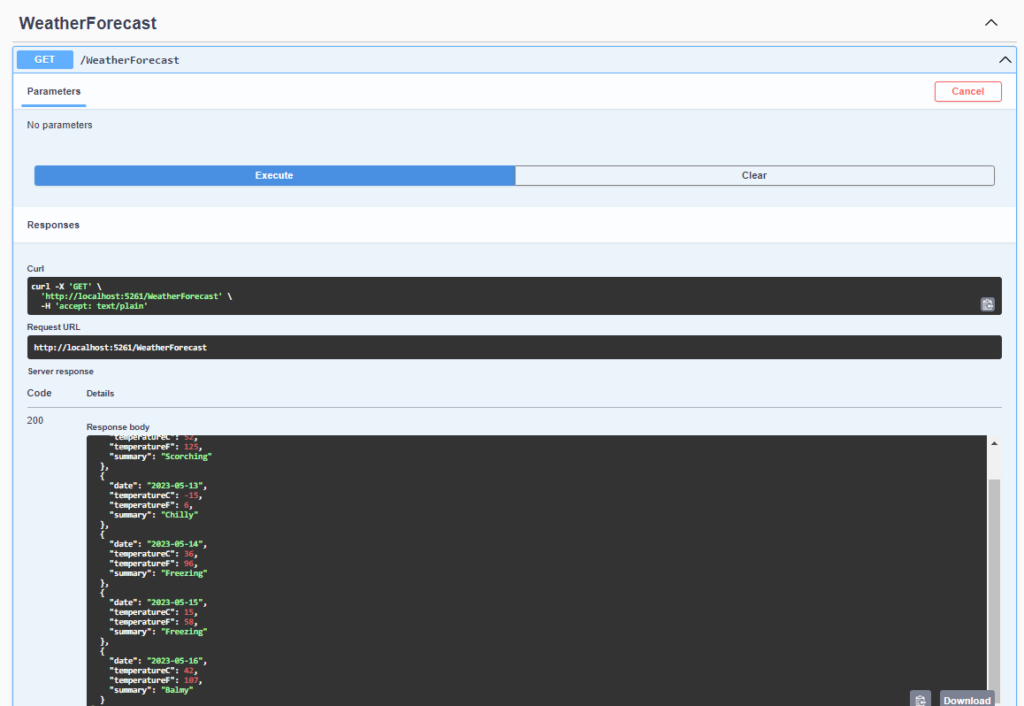
Great. We’ve completed the basic setup. Run you application and navigate to http://localhost:<port>/swagger in your browser, where <port>is the port that your application is running on. You should be greeted with a UI similar to what I’ve shown below.

In the example above, I have a single endpoint, a GET request of the /WeatherForecast API. SwaggerUI also displays the shape and details of the associated classes — DateOnly, DayOfWeek and WeatherForecast — that are associated with this endpoint.

Note that the UI is interactive — you can press that “GET” button to actually issue a GET request against this endpoint.

By adding the Swashbuckle library and integrating it to your pipeline, you were able to stand-up a live API exploration tool that you (and your APIs consumers) can interact with and exercise the various calls of our application. As you update your application with more endpoints, the tool will update the UI and documentation accordingly, keeping it always in lockstep with your actual code.
Closing Remarks
Great news – you get the goodness of OpenAPI and Swashbuckle, directly out of the box with ASP.NET. Simply, new up a dotnet API project using the webapi template, like so:
dotnet new webapiOnce your application is created, check out the NuGet packages that’s already baked into the project – you’ll see that Swashbuckle is already being included. Look at Program.cs and you’ll see that the boilerplate code that it generated already contains the hookups to integrate Swashbuckle into the pipeline. Now with the background above, you know what that package and those lines of code are doing. Give OpenAPI and Swashbuckle a try in your next project. When your QA team or other devs working with you ask you for documentation on your APIs, you can simply point them to Swagger UI.
In the next installment, we’ll dig a little deeper into this tool and see what types of customizations that you can add on top of this out-of-the-box experience. Stay tuned.
